Do you have a garage with exposed 2 x 4s, concrete floors that houses lawn mower, wheelbarrow, tools, autos, trash bins and other outdoor tools and equipment? Would you like the garage to feel a little more finished? Are you tired of mud, dust, bugs, cobwebs and clutter making its way into your garage? Would you love a completely and marvelously organized garage?
Well this post is for you!
THE VISION
About 8 years ago I got a vision for our garage. I was sick and tired of oil stains, cobwebs, bugs and the dreary unfinished ugliness of where we housed our cars and was our first view of our home overtime we arrived back.
As an interior decorator I never give up on a space no matter how hopeless it may seem at first. So I sat down with my client, my husband, and asked him what he would like to see in the garage as far as storage. Beyond that I knew he did not have the ability to see a so called “decorated” garage and at first I believe he even doubted that he wanted me to go there. Perhaps it was my love of pink he was actually fearful of.
I asked him if he could put up dry wall on the exposed areas and he was agreeable. And the DIY began!
I had a couple of challenges right out of the gate. The ceiling was finished in drywall, however we have an attic above our garage and one fine day my husband misstepped and fell partially through it….ie. National Lampoon’s Christmas Vacation scene where Chevy Chase falls through the attic.
My husband tried to patch it, but bless his heart, it was quite lumpy and bumpy…a definite eyesore.
My vision was to take us into a 1950s inspired garage with some Red, Black, White, Grey, and Shiny Chrome.
THE WALLS
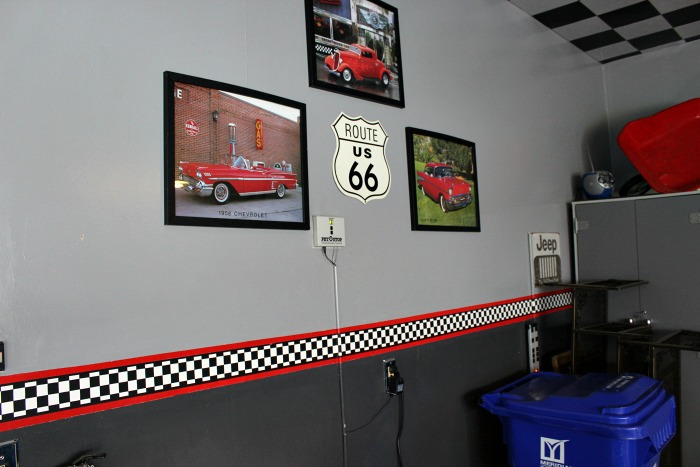
After the walls were installed I painted. Because a garage is a very active place where moving of equipment and tools and cars takes place I knew I needed to select a dark shade. But the last thing I wanted was a big black box – ugh! So I divided the garage wall height as I would any room I wanted to put a chair rail in. The lower part of the wall was painted a deep charcoal.The upper part of the wall was painted saturated gray.
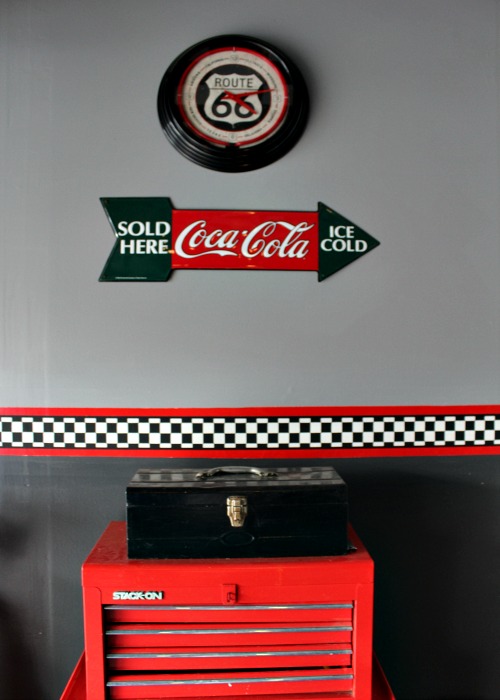
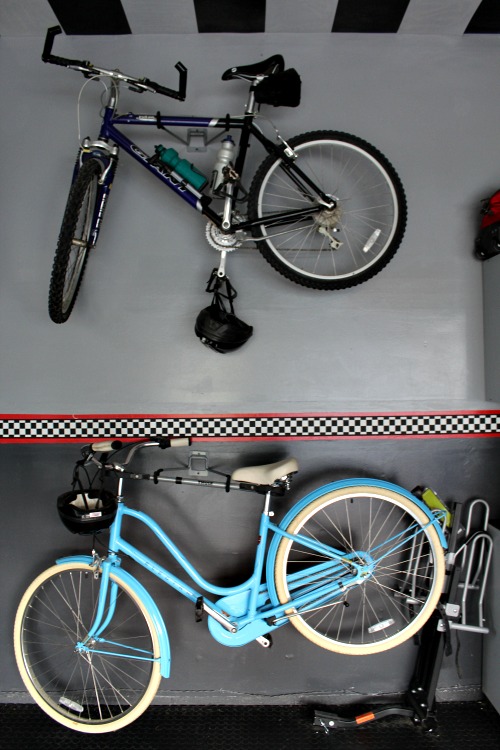
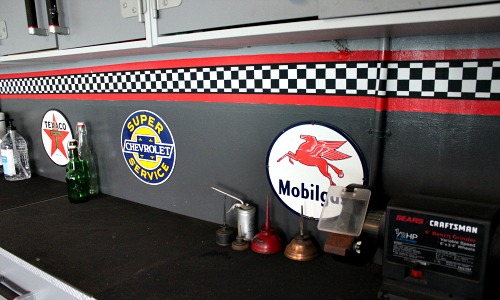
To make it easy for me to bring the two colors together I decided to add a wallpaper border. There were several options to select from. I could have used something with cars on it, but I didn’t want it looking juvenile. I went with a border that had black and white checks bordered in a true red. What a great pop of color and pattern this brought to the space. After all these years it has never worn, torn or peeled!
THE FLOORS
Before we could put storage in we had to deal with the floors. I considered some of the epoxy options often used in garages but because we were doing it ourselves I was afraid of the fumes as well as our ability to apply it correctly. It had a significant cost even as a diy, so I continued to look at other options.
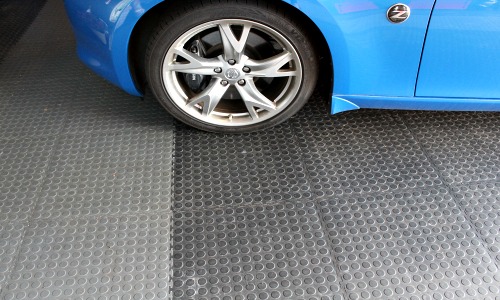
I finally settled on rubber interlocking tiles that are about 16 x 16 inches. I think we found them at our local Lowes store and they came in a few different colors. Again, fearful of drab and dark yet knowing cars would be pulling in and out and leaving leaves, tracks, and leaks, I made a plan using two colors, black and gray.
Installation is simple because there is no adhesive of any kind. All you do is put them together like a puzzle. But let me tell you a 3 car garage is extremely time consuming.
The end result was gorgeous. There were some naysayers that said aren’t they going to move when you drive on them? Aren’t they going to tear? You know, just whatever they could think of to squelch our joy :).
After 8 years, there are a few near the edge that have separated but if we wanted to go through the effort we could take them apart up to the place where they are tight and put them back to get the entire thing tight again. We simply aren’t that bothered by the separation and have decided against trying to fix it.
The tiles are easy to sweep, vacuum and mop and look as good today as the day we installed them. They provide a cushiony surface and really add to the overall design of the garage.
THE CEILING
Normally when I am decorating a room, the ceiling remains white. I know that it is certainly an overlooked area of design and can truly have an amazing impact on a room whether you are installing wooden grids, painting or stenciling, papering and lots of other options.
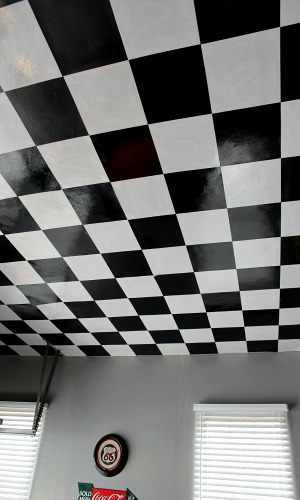
As you may recall, I had a fairly significant blemish on this ceiling that painting was not going to fix. So I decided to try something a little off the wall or in this case off the floor. I chose peel and stick vinyl tiles in black and white at 99 cents each.
This was another easy but truly time consuming application. It also had to be done on a latter and you had to take breaks frequently because you were working over your head, arms lifted and head tilted back.
The end result was truly the icing on the cake! Spectacular, clean, shiny and brought a bit of light into the room with the white tiles.
Disclaimer: If you choose to do this application and you live in an area where the outdoor temperatures swing to below freezing or super hot…which we do…you will have tiled fall. Over the years we just keep our eye on them and if we see a corner starting down we add glue to it and stick it back up. We are not missing one tile and if you don’t mind the upkeep which isn’t that much, I believe you will be extremely satisfied with the result.
I told you it was something. All these years later, we both still LOVE this ceiling treatment.
LIGHTING
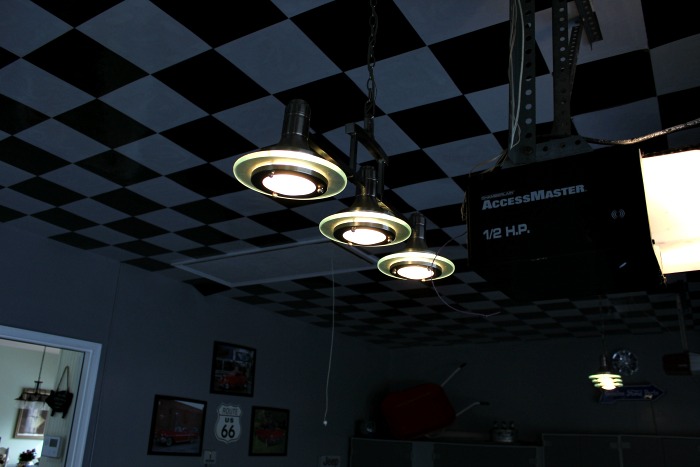
Our garage came with two exposed bulbs. That had to be addressed now that everything else was looking so polished. We chose something that actually had three bulbs per light and had a 1950s feel in chrome.
We have been pleased with the amount of light we got and the fixtures have functioned excellent as well as looking as nice as the day they were installed.
They almost have a neon feel to them. But come on, from a single bulb to stylish, we now have six lights to illuminate the garage.
STORAGE
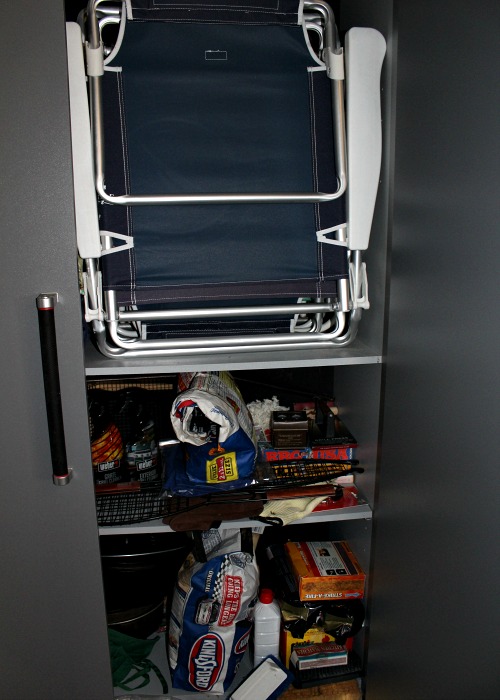
I took my husband storage shopping because he knew what he had to store and my goal was not to have anything out in the open.
He made a list of everything and got ideas of how he wanted it laid out in the garage. My husband is much more of a planner than I am. I look at what makes me happy and purchase it, while he weighs everything and slowly comes to a decision on what to buy. He may have less regrets or returns but when my stuff works which is most of the time, I can transform a space in a day.
We decided based on construction, variety of sizes and price. We lined both sides of the garage with a combination of tall cabinets, base cabinets and uppers, much like you would see in a kitchen layout. They are a light gray bringing a little contrast to both the floors and walls.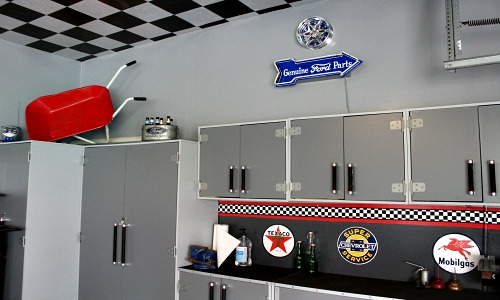
I left the organizing of tools, paint supplies, garden supplies and more to him. He loves organizing and it was his stuff mostly. While I don’t go into the details of organizing your garage, suffice it to say that each cabinet, shelf or drawer has like items in them. Lawn chairs and outdoor games in one. Extension cords in another. Paint sticks, rollers, handles and trays in one and garden gloves, rakes, fertilizer and such in another. It has served us beautifully since the day we completed it.
We did have a few items that were still going to remain visible. One was his red tool chest which matched perfectly and probably was part of the reason I chose the color scheme since I knew it had to remain in the space. The wheel barrow was also too large to fit in a cabinet so he gave it a fresh coat of red paint and set it atop one of the tall cabinets for decor since it isn’t used on an everyday basis.
Our trash and recycle cans needed to be easily accessed and so they also were left out. And our bicycles needed a home, so we hung them on the wall in front of our van.
The storage cabinets have not faired as well over the years. There have been some repairs my husband has made to door hinges and lone of the cabinets closest to the exterior has absorbed moisture in the bottom of the door and looks pretty bad. However, my husband purchased some chrome trim that has the automotive texture to it you see in garages. He plans to trim out the bottom of the cabinets in it and I think it is going to like the jewelry added to an already great outfit. We may wish we added the trim from the very fist day!
FINAL TOUCHES
To finish it off as I would with any room I was decorating I added some personal and decorative touches. My husband had a few model cars he had put together over the years so we set them on top of a cabinet. We bought some tin signs and some photos of cars he liked in red. Our kids have added their imprints with gifts to my husband, a neon clock and a neon car sign.
My husband likes to collect oil cans and tin signs, so they are on display in our garage.
COST
We added up how much we spent in materials and it came to about $6000. I know that sounds like a lot, but we purchased a lot of storage cabinets and the rubber tiles which both carried the highest price tags.
Can you do something similar for less? Absolutely. If you didn’t have the blemish on the ceiling you could totally just paint black and white squares or stripes or chevrons. The epoxy floor would also have saved us a lot of money but we loved the fact that we could remove these, change the pattern and that they had texture. You could build your own storage cabinets or purchase some that were less expensive than we did.
Tell me what you think? Have you got a garage that you have transformed? I would love to hear your comments.
Thank you for reading and if you enjoyed it please share on Facebook, Pinterest, Twitter or Instagram.

 Top
Top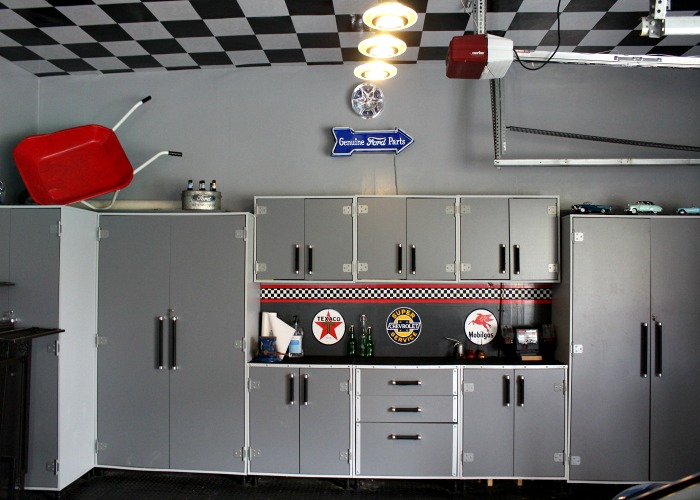

This is great. Maybe one day I will have the time and money to do this to my garage too!
Thank you Clarissa, it really does make a man proud of his space and I love how it stays so clean!
Wow! You really transformed your garage into a racers dream. I love the checkerboard pattern. Thanks for sharing!
thanks, a gift to my husband. We did this years ago but it still looks the same! I hate a boring garage and every awesome car deserves a gorgeous place to sleep 🙂